Every so often, my crafty side makes its way to the surface. Lately, it came around to help with Christmas. It knows I need it.
Specifically, I needed help getting a cute gift for the grandparents that wasn't a typical picture of the kids is some picture frame that says "LOVE" or "FAMILY" on top. Luckily, a week or so ago, I saw on the
Zimmer Zoo a post about
silhouette portraits. There is a very talented local artists who does them free-hand (ya, amazing, I know). She was in town but I didn't have my act together to make an appointment. Shocking, right? But I still loved the idea as something a little different but just as nice to give to as a gift. So, I was on a quest to do it myself.
My Google search for how to do it resulted in a lot of professionals, which would require time and money, two things I don't have lots of. But, I found another blog (I would link but for the life of me, I can't find it now...) that showed how to do it yourself. She used Photoshop. I don't have Photoshop so I had to improvise. If you, like me, are short on time, money and Photoshop, here is how you can still do your very own silhouette portraits:
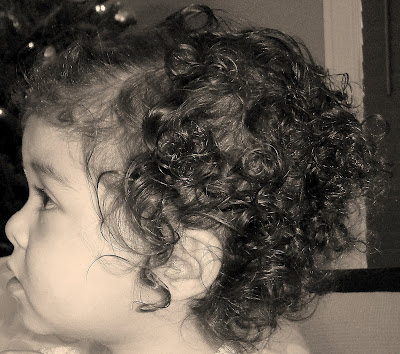
Step 1Take a picture of your child in profile. Catch them while they are watching TV or something else interesting. You may already have a photo that works - check your albums.
Step 2Using whatever software you have (I use Picasa), crop your picture so that you can zoom in just on the head. Then, to save on color ink, switch it to black and white or grayscale.
 Step 3
Using MS Powerpoint (or MS Word, but I prefer PP)
, insert your photo onto the page and adjust it (keeping the ratio intact) to your desired size. The first ones I did were as big as possible and now will barely fit into an 8X10 frame. Learn from my mistakes and do them a bit smaller. You could also fit two on one Powerpoint slide and that will give you portraits appropriate for a 5X7 frame.
Step 4
Print out
the
slide. With a pen or pencil, trace along the outline of the head and face. Then cut out very careful along your line. Be especially careful around the nose and mouth as those areas will really tell you whose portrait it is.
Step 5Take your cut out and trace it onto very nice black paper. I found this paper at a craft store. Its much heavier than regular card stock but regular card stock would work just fine. Just don't use construction paper - it's not a very dark black and won't look as nice in the end. Cut out along your lines, again very carefully, especially on the face.
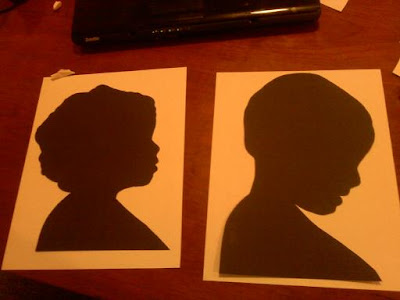
Step 6Now you can mount your portrait. I sued the same kind of paper for my mount (not shown in the picture below) in an off-white color to give it an antique-y look.
 Step 7
Place in your frame of choice, wrap and give to Grandma.

 I wasn't sure what the best size would be so I printed a smaller and bigger one of each

 Colie, admiring her flat self


